How to take a passport photo at home (step by step)
You can take a US passport photo at home when it meets State Department rules on size, background, lighting, and expression. Most rejections come from a busy wall, harsh shadows, a selfie angle, or a bad crop—not from taking the photo yourself. This guide is a practical home session: gear, lighting that actually works in a living room, camera distance, pose, crop, and a submit checklist. Verify current rules on travel.state.gov before you renew online or mail forms.
What you need for a home session
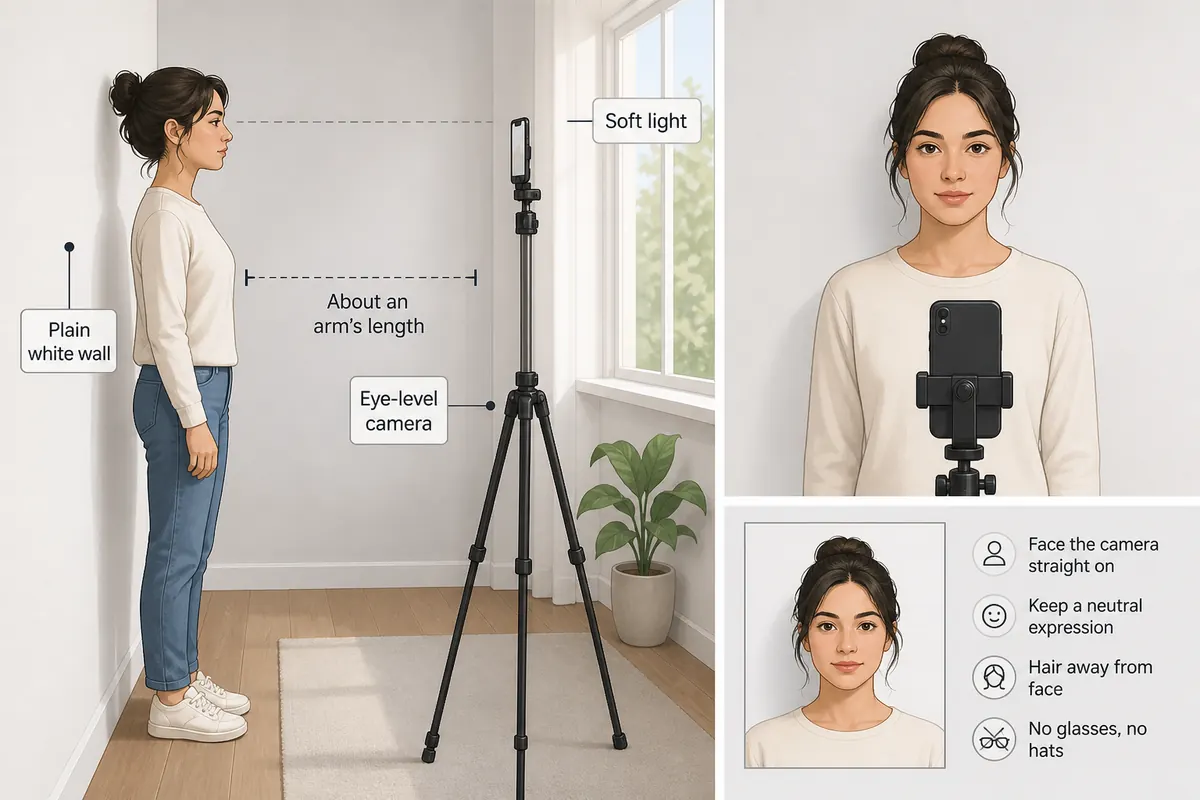
Use a smartphone or digital camera with enough resolution for a sharp face—most modern phones are fine. A plain white or off-white wall is the best background. Ask someone else to take the picture, or use a tripod with a timer. Front-camera selfies often fail because of angle and facial distortion.
If you are renewing online, you still need a recent color photo that looks like you today. Home photos are allowed when they meet the same rules as a studio shot. Treat this as a checklist session, not a creative portrait shoot.
Clear the wall of shelves, plants, and textured wallpaper. If the wall is cream or patterned, hang a plain white sheet flat and wrinkle-free behind you.
- Plain wall or a white sheet hung flat
- Daylight facing a window, or two lamps at eye level
- Solid everyday clothing that contrasts with the background
- A helper or tripod so the camera stays at eye level
- Enough space to stand a few feet from the wall
Lighting that passes review (not just “bright enough”)
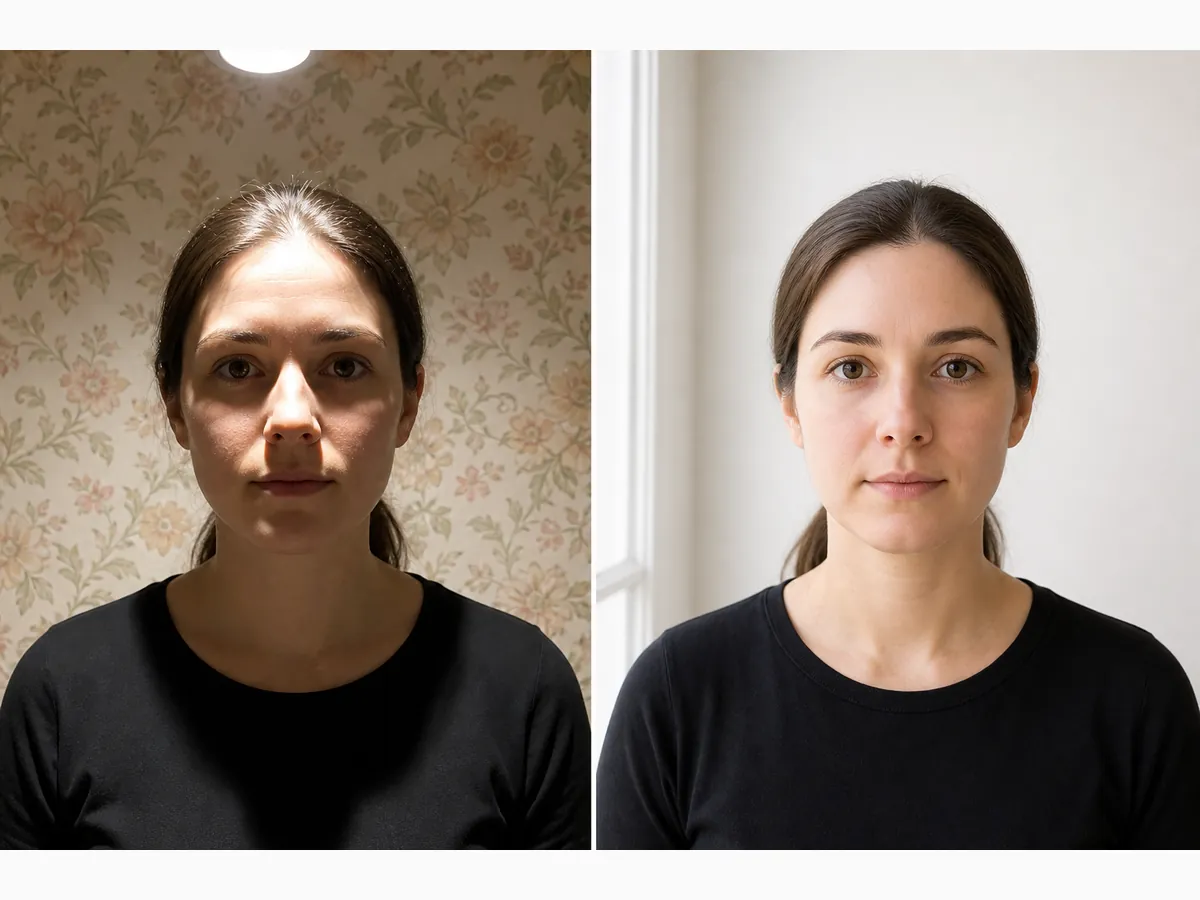
Passport lighting is about evenness, not drama. Soft daylight from a window in front of you (or slightly to the side) is the easiest home option. Two household lamps at face height, one on each side, also work if you match their brightness.
Avoid overhead-only ceiling lights. They carve shadows under the chin and often leave a dark oval on the wall behind the head—classic reject patterns. Avoid a bright window directly behind you; it turns the background uneven and silhouettes the face.
Skip harsh on-camera flash aimed straight at the face when it creates hot spots or red-eye. If you must use flash, bounce or diffuse it and recheck for glare on skin and glasses. Turn off beauty modes that reshape the face.
- Face soft window light or matched side lamps
- No strong shadow under the chin or behind the head
- Background stays plain white or off-white under the same light
- Natural skin tone—no heavy color cast from colored bulbs
Distance, height, and framing before you shoot
Stand about an arm’s length to roughly three–four feet from the wall. Too close and the wall texture or sheet wrinkles show; too far and the head becomes tiny after crop.
Keep the camera at eye height. Looking down from above (classic selfie) shortens the face and is a frequent fail. Looking up from below exaggerates the chin. Leave a little space above the head so you can crop to 2×2 later without cutting hair.
Use the rear camera when possible. Clean the lens—fingerprint smudges look like soft focus. Take several frames; pick the sharpest one with both eyes open.
- Camera at eye level, not above or below
- A few feet from a plain wall or sheet
- Space above the head for cropping
- Rear camera + helper/tripod preferred over front selfie
Pose, expression, glasses, and clothing
Face the camera straight on. Mouth closed, neutral expression. Both eyes open and clearly visible—move hair off the forehead if it covers the eyes. Shoulders square so both sides of the face show.
Do not tilt your head or look over one shoulder. Remove hats and dark glasses unless you have an allowed religious or medical reason and the face stays fully visible from chin to forehead.
Wear a solid top that does not blend into a white wall. Navy, charcoal, or burgundy usually works better than a white shirt on a white background. No uniforms or camouflage except where rules allow everyday or religious attire.
- Neutral expression, mouth closed, eyes open
- No headphones, filters, or beauty apps
- Glasses only when allowed—and without glare
- Clothing contrasts with the background
Crop to 2×2 and prepare the file
After you take the photo, crop to the official 2×2 inch square with the head between about 1 and 1⅜ inches from chin to top of hair. Our free browser tool applies that template on your device—nothing is uploaded to our servers.
Before you submit, check: plain white or off-white background, no shadows, natural skin tone, sharp focus, and a file size that fits the online form if you are renewing digitally. Convert HEIC to JPEG when the form requires it.
For paper applications, print on quality photo paper and submit two identical prints when required. A 4×6 sheet with multiple 2×2 copies is fine if you cut carefully.
Common home-photo mistakes
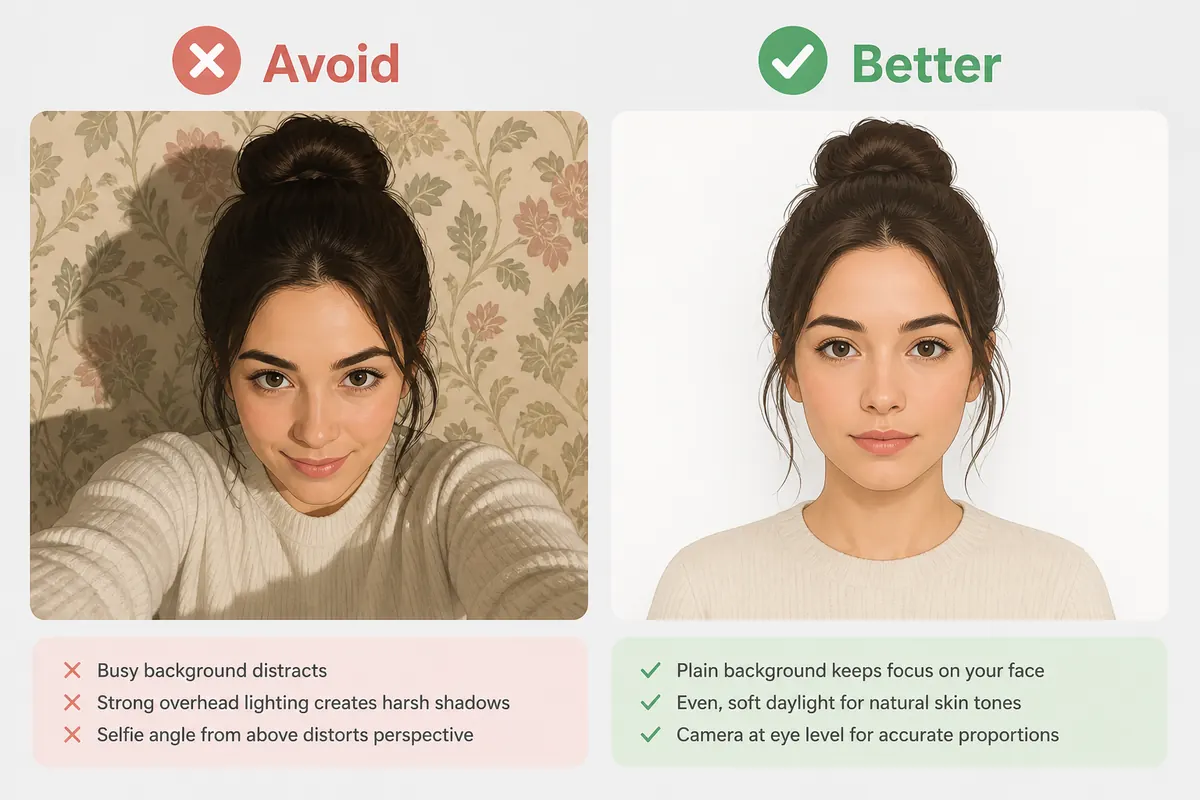
Frequent issues: a cream or patterned wall that looks “almost white,” overhead lighting that casts a shadow behind the head, a selfie angle that tilts the face, and cropping so tight that head height falls outside the allowed range.
Heavy filters or beauty apps are another trap. Official rules disallow altering appearance with filters or AI. Use only basic brightness or contrast if the original is too dark—do not reshape the face.
- Busy, colored, or textured background
- Shadow behind the head or under the chin
- Head too large or too small in the final crop
- Glasses glare, tinted lenses, or Portrait-mode blur
- Front-camera selfie distortion
- Beauty filters or AI face edits
A practical shoot order (10–15 minutes)
Clear the background → set lighting → lock camera height → shoot a burst → pick the sharpest frame → crop with guides → checklist. Stopping to “fix it in editing” usually costs more time than one extra take.
- Minute 1–3: clear wall / hang sheet; change into contrasting clothes
- Minute 4–6: set window or two lamps; kill harsh overhead-only light
- Minute 7–10: eye-level shots with helper or timer; take 8–12 frames
- Minute 11–15: pick best frame, crop to 2×2, run the checklist
Quick checklist before you submit
If any item fails, retake before you pay fees or mail forms. Fixing a photo later usually costs more time than one careful home session.
- Taken within the last six months and looks like you now
- Plain white or off-white background with even light
- No shadow under chin or behind the head
- Neutral expression, mouth closed, both eyes open
- Correct 2×2 crop with head height in range
- No filters; JPEG ready if the form rejects HEIC
- You rechecked travel.state.gov for your application type
Home photo for online renewal vs mail-in
The visual rules are the same. Online renewal adds file-type and file-size limits. Mail-in adds photo-paper prints—usually two identical 2×2 copies. Decide which path you are on before you leave the session.
Keep the uncropped original and the cropped JPEG. If automated upload checks fail, you can re-crop from the better source instead of a tiny export.
Ready to crop your photo?
Free online tool—pick your country template (US 2×2 or UK 35×45), align your head, and download. No account needed.